

How to Make Free Logos with Canva: The Ultimate Step-by-Step Guide
- Mar 16, 2018
- 9 min read
As a social media manager, website designer, and blogger, I use Canva ALL THE TIME! It’s my go-to tool for creating beautiful graphics and images for my audiences. In fact, all of the logos and Pinterest graphics within this website were created with Canva quickly and easily. I’m so excited to show you how to make a logo with Canva!
In today’s tutorial, I am going to go through Canva step-by-step:
To demonstrate, I’m going to recreate my logo in Canva so you can see how simple and easy it really is!
Let’s jump in and get started!
Step 1: Sign Up for a Free Account
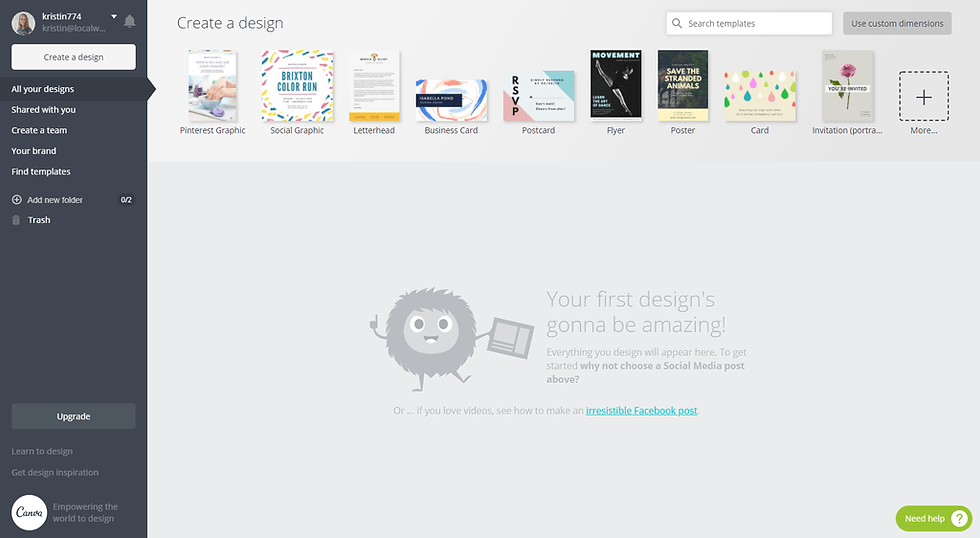
When you get to Canva’s home page, you’ll see a white box with a bunch of options. I’m going to assume that most of us are small businesses or bloggers, so we’re going to select the second option.

Next, we’ll be asked to sign up with Google or email. For this example, I’ll be signing up with an email address. You can use your business or blog name if you want.

Once you are logged in, you’ll see a page like this…
[thrive_text_block color=”note” headline=”See this post, ‘How to Make Free Logos with Canva: The Ultimate Step-by-Step Guide’ on Twitter”]https://twitter.com/localwebstrat/status/996061087152918528 [/thrive_text_block]
Step 2: Set up Your Brand Colors
Before we create anything, we’re going to save ourselves some time by setting up our brand colors. You’ll need to click on “Your Brand” on the left side menu.

Under the free version of Canva, you can set up three different brand colors.
Note: The logos and brand fonts are not available in the free version. But you can upload your logo later and still use it. It just isn’t available in the “Your Brand” section.
My logo has three different colors so I am going to add all three of those to this page. Now, when I make other graphics, I can make sure that all my colors are cohesive.

[thrive_text_block color=”teal” headline=”PRO TIP!“]If you’re not sure how to get the color hex code for your brand, there is a super easy trick.
On a Chrome browser, install the Colorzilla Extension. After you install, there will be a Colorzilla icon displayed in the upper right of your browser (under the downsize, minimize, and X buttons). You’ll simply need to click the icon and then hover your cursor over the color you want. There will be a black bar across the top of your screen which shows you the hex code. You can copy/paste that code into Canva.

[/thrive_text_block]
Step 3: Designing Your Logo
Let the fun begin! We’re ready to start learning how to make a logo in Canva!
To get started, click on “All Your Designs” on the left-hand side to get back to the main screen. You’ll see a row of template sizes across the top. On the far right, you’ll want to click on the “More…” box.

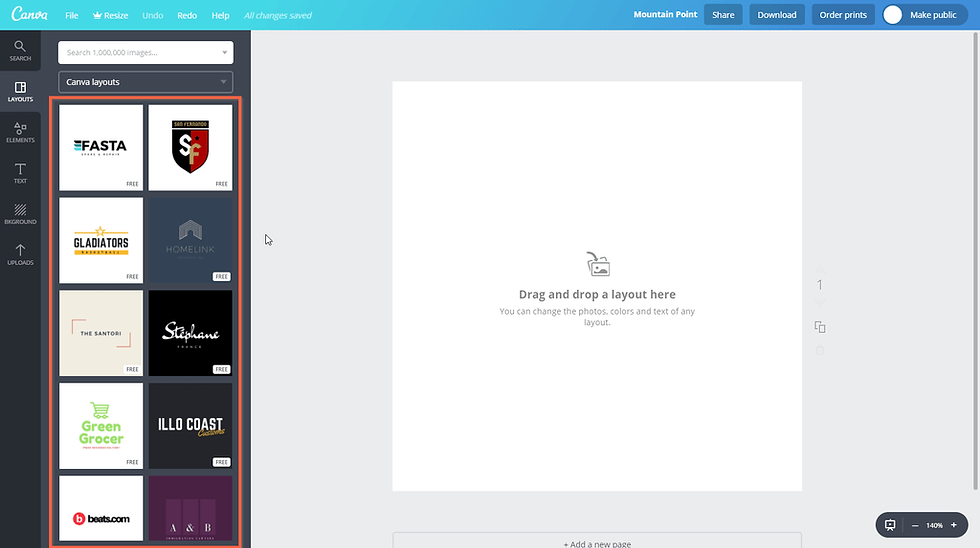
After clicking on the more box, you will see a lot more templates to choose from. If you scroll down a little, you see one called “Logo” under the Marketing Materials section. Click on “Logo”.

Now you’ll see a lot of free templates (be careful, some of them might cost money… the free and paid are mixed together). You can choose one of those templates and customize it to fit your brand or make your own unique logo.
For this tutorial, I’m going to show you how to make a logo with Canva without using a template (which could be one of the hardest decisions you’ll make in your life… okay, maybe not, but it could take a while to choose! LOL). This will give you a better idea of how much you can do with Canva. But don’t get stressed out! Trust me, it’s going to be fun and you’re going to love it!
To start making your own logo, we need to start with some text. So, we’re going to click on the “Text” icon on the left sidebar and choose the “Add heading” text. You can also select one of their pre-selected layouts if you want.
[thrive_text_block color=”note” headline=”See this post, ‘How to Make Free Logos with Canva: The Ultimate Step-by-Step Guide’ on Facebook”]https://www.facebook.com/localwebstrategies/photos/a.528441224164068.1073741828.527093884298802/629922027349320/?type=3&theater[/thrive_text_block]

Next, I’m going to replace the default text with my blog name and change the font to the one I would like to use.
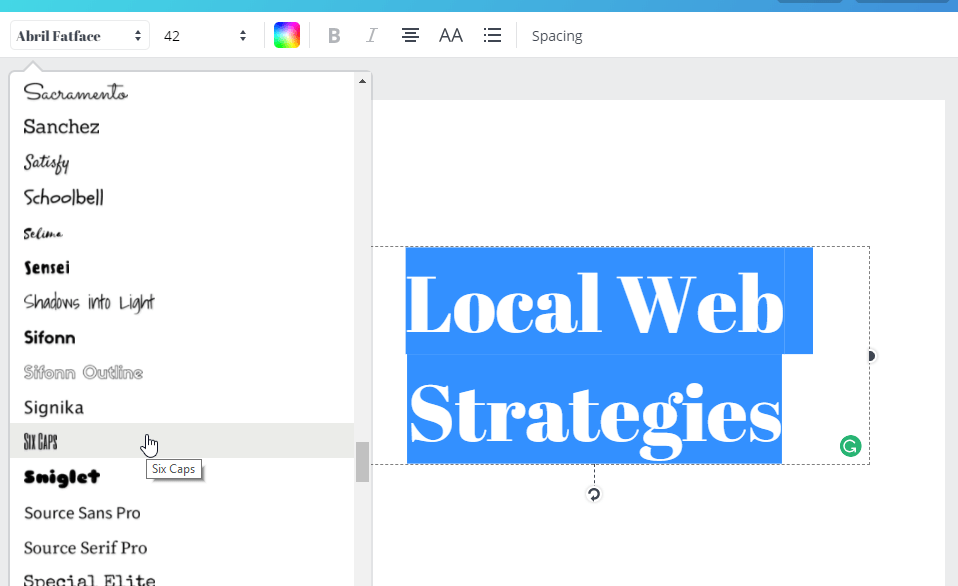
Once you’ve selected the font you want, you can change the font size and pick the color. This is where what we did in Step 2 comes in really handy! You’ll see the three colors that we defined earlier as quick links for you to select! How awesome is that?!

Next I’m going to add my tagline “Websites & Social Media Made Simple”. I’m going to repeat the steps above:
Click on the “Text” icon in the left menu.
This time I will click on “Add Subheading”.
Replace the default text with my tagline.
Change the font, font size, and color.
Lastly, I will click and drag the text box to move it where I would like it.
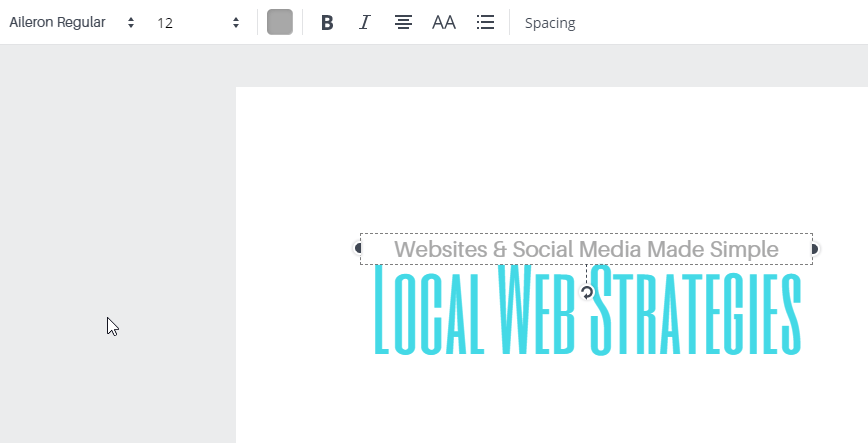
I don’t quite like how this looks, so I’m going to make a few other adjustments. First, I want to see what the tagline will look like in uppercase letters, like the blog name. Thankfully I don’t have to rewrite the whole tagline in all caps to make this happen. Simply click on the “AA” button and your text will automatically be transformed into uppercase. Once I did that the words looked too big, so I reduced the font size.

It’s looking great, but I think it’ll look even better if I add a little space in between the letters. You can do this by clicking the “Spacing” button at the top of the editor and then drag the letter spacing bar until it looks the way want. Keep playing with the font sizes and spacing until you have a product that you like.

I want to add one more line of text to my logo, so I will repeat the steps above. Next, we’re going to add a few embellishments. However, before I can do that, I need to move everything over on the workspace so that there will be room for the picture I want to add. You can do this by clicking outside the white box and dragging your cursor over all of your work (click the mouse and don’t let up until you’ve captured all the elements – see the picture below). This will group everything together so you can move everything at once.

Now I’m going to add my circle picture to the left of my text. Simple click on the “Elements” icon in the left menu. You can select any of the options to pull up if you’d rather not have your own picture. You can also use the search bar if you’re looking for something specific. Just remember that not everything is free. To get my picture on my logo, I will click on “Frames”.

Next, I’m going to scroll down until I see the circle option. Any of these allow you to upload your own image and insert it these layouts and shapes. Lastly, I’ll click on the circle, which automatically adds it to my workspace. Click and drag to move it where you want and resize it by clicking any of the four corners and dragging to size.

To upload a picture that will go inside the circle, click on “Uploads” in the left menu. Then select “Upload Your Own Images”. A box will pop up and you’ll need to find the image on your computer that you’d like to use.
Once the picture is uploaded, you need to get it inside the circle. Do do this, click on the picture and drag it on top of the circle icon. It will automatically drop inside the circle.

[thrive_text_block color=”teal” headline=”PRO TIP!“]If you made a mistake, no worries. You can undo your last move by holding down the Ctrl key on your keyboard and then pressing the Z key. You can also click on the “Undo” button at the top left of your screen.

[/thrive_text_block]
Now that my picture is in, I want to rotate it just a little for extra effect. To do this, click on the white circle with the arrow at the bottom of the image. Click and drag this circle until it’s at the angle you want.

It’s looking so good, but I have 2 more elements to add! Let’s do it!
I want to add a line under the blog name, so we’re going to do that by clicking on “Elements” again in the left menu. Once you click on Elements, it will remember that last place you were at in the Elements section, so you might have to click the black X to get back to the beginning. Now, you can click on “Lines”. I want a straight solid line, so I will select the first option.

Now I can change the color and use the dots on the line to resize the line. Thankfully, Canva helps you line things up evenly too! As you’re moving the elements, you’ll see purple dotted line pop up as a guideline for lining things up.
[thrive_text_block color=”note” headline=”See this post, ‘How to Make Free Logos with Canva: The Ultimate Step-by-Step Guide’ on Pinterest”]https://www.pinterest.com/pin/698972804641744911/[/thrive_text_block]

Now my line is on top of my bottom text! That’s okay, Canva provides an easy way to fix this! Make sure that you click on the element you want to move, in this example that would be the gray line. Next, click on the “Arrange” button. To move the line behind the text in this example, I’ll click on “Back”. Depending on what you’re working with, you may have to click back more than once. Just use the back and forward buttons to move the element where you want it.

Lastly, (we’re almost done!), I don’t like how the orange and gray clash, so I want to put a white background behind the text. I’ll do this by selecting the same line that we got for the gray line. However, this time I’m going to make the line white and arrange it behind my orange text using the arrange button like above. I’ll make sure that it only covers the gray line and nothing else.

[thrive_text_block color=”teal” headline=”PRO TIP!“]If you can’t quite get an element to move where you want it, click on it so the see the tops in the corners and then use the arrow keys on your keyboard to move the element up, down, left, or right. The arrow keys make the element move more precisely where you want it. [/thrive_text_block]
Step 4: Make Variations
At this point, you might be happy with what you came up with on your first try or you might want to make more variations. To do this you have two options.
Option 1: You can add a new page and start with another plain white workspace. To do this, simply click on “+ Add a new page” at the bottom of your screen (under the white workspace you’ve been working on). This way you will have a blank slate to create a completely different version of your logo.

Option 2: If you want to keep the same layout but change the colors or maybe add some different elements, you can make a copy of your existing workspace by clicking the “sheet” icon under the number 1 on the right side of your workspace.

Step 5: Download and Crop
Now that you’ve learned how to create a logo in Canva, it’s time to download (one or more if you created multiple). It’s really easy! All you need to do is first make sure that the top banner says “All changes saved.” Otherwise, your logo might not look right after you download it.

Next, click on the “Download” button in the upper left. For logos, the file type defaults to PDF. You’ll most likely want to change this to either JPG or PNG if you want to save it as a picture for your website or social media.

If you only have one version of your logo, you’re ready to click the green “Download” button. If you made more than one version, you can choose to download all of them (it downloads them as a zip file so you will need to extract them afterward) or you can download only the ones you choose. Each one you made had a number off to the right… you’ll use that number to say which version you would like to download.

When the file is downloading, you’ll see a box like the one below. Once download is complete a box will pop up giving you the option to chose where to save the file on your computer.

Once the file is downloaded to your computer, you’ll probably want to crop out the extra white space. If you have Windows 10, you can navigate to the folder you saved it in and double click on the photo to open it. Click on the “Edit & Create” option at the top of the screen. A box will drop down and you’ll need to click on “Edit”.

Next, in the top right, click on “Crop & Rotate”. Then you need to click on the “Aspect Ratio” box and select “Custom”.

Now you can drag the large dots at each corner to the size you would like.

Lastly, you need to click “Save” or “Save a Copy” if you want to keep the original image.

[thrive_text_block color=”teal” headline=”PRO TIP!“]If you do not have the ability to crop on your computer, you can visit ImageResize.org that allows you to upload your image, crop the picture, and then save it back to your computer. [/thrive_text_block]
If you find that there are more edits you want to make, don’t worry! Your work is all saved in Canva so you can go back and make more changes.
Way to Go! You Learned How to Make a Logo with Canva!
Now you’ll be making logos and graphics for free with Canva like a pro! It might take a little practice to create the things you want but I promise it will get easier as you go. I hope this guide was helpful to you! Can I ask you a favor? Comment below describing your first Canva logo creation. Did this article help you? Was there something missing or something I could have elaborated? Share your logo below!
You can always contact me via email as well.


This is a very thorough guide to creating logos in Canva! The step-by-step instructions are incredibly helpful, especially for those who are new to design. If anyone finds themselves wanting to create a quick video walkthrough of the process, a screen recorder from this site could be useful. I appreciate the detailed explanations, I’m eager to give it a try.